Wednesday, May 16, 2012

Floral Frugality

Flowers. I love them.  If I could, I would have fresh flowers on my dining room table all the time.  It is a special treat when my Honey brings me flowers.  I will confess that when he first started bringing me "grocery store" flowers instead of "flower shop" flowers, I was offended.  I'm such a silly woman!  I have discovered I like arranging flowers; and it is so much less expensive to get some grocery store flowers and arrange them yourself, especially if you have a small stash of old vases.  Now flowers are *always* more expensive around Mother's Day, so the cost quoted here is higher than normal.  I know at my grocery store you can usually get a bouquet of flowers for around $10.

The day before Mother's Day, my Honey came home with two large beautiful bouquets -- from the grocery store.  :)  Because I knew I was going to turn this into a blog post, I asked if he minded if I knew how much he spent.  He said it was around $34.  Readers, I got two arrangements out of these flowers!  So I have a large bouquet on my dining room table and a bouquet in my kitchen.  I'm going to put pictures of what I see as comparable bouquets from the Telaflora website so you can compare the "flower shop" bouquets to the "grocery store" bouquets.

Two Grocery Bouquets and a Vase

The first bouquet-at-home, short 'n sweet and full...


A comparable "flower shop" bouquet at $39.95 -- more than both grocery bouquets together!

The second bouquet-at-home, simple and elegant.


The comparable "flower shop" bouquet at a whopping $44!

My youngest daughter is living with my middle daughter for a month this summer.  As a tradition, I usually have flowers waiting for my girls when they come for a visit.  So my middle daughter did that for her sister.  She can't find her camera at present, but she bought a grocery bouquet of multi-colored roses for $15, arranged them in a short modern vase, and put a pretty pink fabric ribbon around the middle.

The comparable "flower shop" bouquet at $59.95!
I personally like my bouquets better than the floral shop bouquets, and it was a total difference of $49.95.  If you'll notice, my lily bouquet has a lot more lilies waiting to bloom than are in the floral shop bouquet.  So the lesson here?  Don't be a flower snob like I was; and be grateful that you can get, for yourself or someone you want to cheer, flowers from the grocery store!

Ps - The only way this might not work is if you want someone out-of-state to have flowers.  :-)

Wednesday, May 9, 2012

A Different Way to Look at Eating

At the end of January I began a journey.  I say it is a journey because as with anything new it is best to take baby steps.  I began a new eating plan.  It is called the Maximized Living plan (ML).  It goes very much against conventional wisdom of low-fat, high carbohydrate diet plans.  I am using the word diet to reflect a lifestyle of eating, not a weight loss program.  Everyone is on a "diet" -- it simply refers to the intake of food, although I think most of us relate it to the way we eat to lose weight.

Maximized Living has two different styles.  One for people who want to eat better (remember this isn't conventional here) and one for people who have a lot of health issues and do want to lose weight.  They are called the "Core plan" and the "Advanced Plan".  There is no way I can explain it all in a blog post, and I'm not sure that would be appropriate.  But I will give you the basics for now that are pretty easy to follow once you give it some thought.

*DON'T eat refined foods(read sugar laden, processed foods)
*DO eat high quality carbohydrates, a moderate amount of good protein and a moderate amount of good fats... this includes saturated fats, like butter
*DO eat organic fruits and vegetables; organic/raw dairy products; and grass fed, naturally raised meats.  I will say to eat organic is more expensive, and I don't eat everything organic.  I do buy organic milk and half & half, some veggies, and the grass fed beef.
*The ML plan recommends certain supplements and is often in followed in conjunction with chiropractic care (which I don't believe is necessary physically and can be impossible financially).
*DO exercise!  The DVD the plan provides, which I use, is 12 minute interval training.  It is hard, and you'll hurt.  But it's only 12 minutes.  I am feeling stronger and more toned in only 4 weeks (3 days per week).

I began the ML plan with baby steps.  The first thing I did was get off sugar and grains (reduction in grains is part of the Advanced plan).  I did really well for the first 6-8 weeks.  I had an emotional melt down at that point, and guess what... I'm an emotional eater.  :-P  I'm wanting to get back off sugar, but it is hard!  I'm not sure why.  I feel so energetic when I don't have it in my body.  It's funny I am writing this today, since I"m really committed to get off sugar starting today.  :-)  In the 6-8 weeks I was faithful to this plan, I lost 17 pounds -- WITHOUT any exercising!  As mentioned, I have started exercising now; and I think it his helping me maintain my weight loss.

Some of the things that *really* go against conventional wisdom (that I had to get over) were:

*DO use full fat dairy
*DON'T eat pasta, not even whole wheat (part of the Advanced plan; allowed in the Core plan)
*DON'T eat by the clock.  Eat when you are truly hungry, not because it is "time to eat."  This was hard for me.

Now you may be concerned about using full fat dairy, I understand.  What you need to know is that using full fat dairy will keep you full and satisfied longer.  When companies make low/non fat food they are taking out the element that has a lot of the flavor, so they have to replace it.  What do they replace it with? Sugar and/or high fructose corn syrup or corn sugar as they are beginning to call it.  These things are just not good for your body.  And if you give it some thought, it has been since "low-fat" dieting has been the norm that we have begun to see so much about the obesity/diabetic epidemic in the USA.  So that should tell you something about sugar, right?  You may find yourself needing to teach yourself it is okay to eat full fat dairy if you are interested in this way of eating.  It honestly didn't take me long.  It is so yummy, mouth-satisfying, and helps you eat less in the long run by keeping you full!  (Example: My daughter tried this way of eating for only a couple of days.  The day before she started, she had eaten 3 regular meals and 4 snacks because she usually feels hungry every couple hours.  The very day she started eating the basic ML diet, she had 3 regular meals of smaller portions and only 1 snack.  Less food, more full!)

A quick example of what I ate one day this week which was all very satisfying:

9am - a blueberry/baby greens smoothie (I promise you don't taste the greens)
1pm - a granny smith apple with some white cheddar cheese
5pm - a wonderful tuna salad (made by my Honey) over baby greens
8pm - a Lara bar (a food bar with nutritional, clean ingredients) and a glass of whole milk.

I think that is about it in a nutshell.  I feel so much better, have more energy and am losing/maintaining my weight without spending hours obsessing over food and exercising.  It is a good fit for me!

Here is a link to the main ML page for those who may want more information (and so I am above reproach as far as copy write laws!).

Sunday, May 6, 2012

Marshmallow Fondant Redemption

I'm a sentimental person, especially concerning experiences.  I like to live them to the fullest, to make them perfectly special.  "Firsts" and "Lasts" especially get me.  Last year was Eme's first birthday.  My sweet daughter... my first daughter, my last biological child.  This was a big event!  And we had just moved into our first home, both our families were in town, it was Easter week, and we had invited a lot of people to celebrate with us.  Everything was so busy but falling nicely (though crazily) into place.  Until I tried to make a butterfly cake.  I am usually successful in the culinary endeavors I undertake, so it was a bit of a shock to my system that I couldn't seem to follow simple directions to turn two round cakes into a butterfly.  Cut it, turn the pieces, frost.  First, it was a brain bender to figure out how to turn those silly pieces.  Second, frost fresh, crumbly cake sides that have been cut?  Yeah.  In your dreams.  As silly as it may seem to you, it crushed me inside to know that my precious daughter's first birthday cake was a disaster (according to my perfectionistic standards).  It would forever be documented, too, because of course numerous pictures are part of a first birthday celebration.  I had to give it up internally.  And I was able to let it go with the Lord's help.  It stopped making me sad after a while and just became a memory I (sort of) giggled at.  But guess what -- birthdays come every year!  So, for Eme's second birthday, I decided I would try to make up for last year's flop.

I saw a recipe for Marshmallow Fondant on Allrecipes.  Now, I've never truly had fondant; but I hear it's gross and very hard to work with.  This marshmallow fondant claimed to be easy and tasty.  Sounds good to me!  A new challenge that seems to have an "easy way."

Here is the original recipe from Allrecipes: Marshmallow Fondant

And here is the recipe according to what I did ('cause I'm a recipe tweaker!):

Vegetable shortening
1 1/2 pkg mini marshmallows (approx 16 oz)
1/4 cup water
1 tsp lemon extract (or your favorite!)
2 lbs powdered sugar

1) Place marshmallows in large bowl and microwave 1 minute until they just start to melt.  (If you have a stand mixer, transfer the marshmallows to the mixing bowl.)  Stir in water and extract until mixture is smooth.  Beat in the powdered sugar 1 cup at a time until a sticky dough forms.  Reserve at least the last cup of powdered sugar for kneading, if not more.

2) Coat your hands with vegetable shortening and begin kneading the dough in the bowl with more powdered sugar.  It will start to come together enough to turn out onto a well dusted counter.  Knead with the reserved powdered sugar about 5-10 minutes until dough is smooth and no longer sticky.  At this point, add in food coloring if desired and knead until color is achieved.  Wrap tightly with plastic wrap and refrigerate overnight.

3) When ready to use, allow fondant to come to room temperature.  Dust counter with powdered sugar and begin rolling fondant out to desired size and about 1/4 inch thick.  Continually lift up parts of the fondant and re-dust counter to prevent sticking.  If fondant sticks or rips and becomes unsalvageable, simply ball up the fondant and start again.  Carefully transfer rolled-out fondant or prepare decorations as desired.


I don't think I've ever made such a mess while baking.  I had powdered sugar from my shoulders to my toes.  It was almost a comedy trying to knead the fondant while it was still sticky, and powdered sugar was floofing everywhere!

Fondant, divided and colored.  I like to use gel food coloring.  And that scraper is a best friend for
getting sticky spots off the counter while you're kneading.

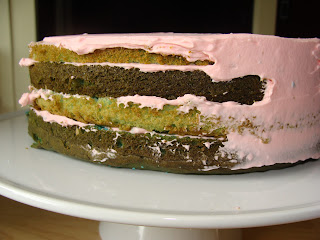
Before you put fondant on, first you need cake.  I made a white cake with some added lemon flavor.  I divided the batter and did light blue and dark blue.  Split the layers, stack them, and then you end up with a fun striped cake.  I used my all time favorite frosting recipe, Sturdy Whipped Cream Frosting (regular cream cheese, no almond extract).

Get a nice coat all over the cake, as smooth as possible to prepare for the fondant.
An off-set spatula is spectacular for this!

Next day, same mess from shoulders to toes.  :-)  LOVE my new rolling pin -- first real one I've ever had.  Tip: If you want your husband to TELL you to get a new roller, just lose your brain and think it's a good idea to use your current not-so-great plastic roller to stick down vinyl tiles in your mud room.

Yep.  Had to start over.  Dust and re-dust... and dust some more.  Trust me.

Whew!  That was a bit tricky.  Try not to let the full weight of the fondant pull on itself.  That's how cracks appear.   I only had one, whew!  The only other issue I had was some bubbling under the fondant.  I just pushed those to the middle, sliced off the bulge, and the Blue's Clues paw print nicely covered it.  ;-)

Ta-da!  To get rid of the visible powdered sugar, use a small piece of extra fondant to gently rub it into oblivion.
(Ps - I have enough fondant left to do a whole other cake!)

Wednesday, May 2, 2012

Simple Goodness: The Potato Chip

If you're like me, you love crunchin' and munchin' on things.  I've always liked corner brownies, the crusties of fresh baked cake, the charred bits of grilled meat...and, of course, chips.  Now, I want you to take a good long look at that delicious chip to the left.  Looks gourmet, huh?  The expensive kind of potato chip that's thick and beefy with a good "real potato" flavor and a touch of salt.  You know the kind I'm talking about?

Yeah.  It just came out of my microwave.  And it's tasty-schmasty!

My mom and I were just talking yesterday about how people occasionally ask the question "Do you like to cook?"  I never really know how to answer, honestly.  I cook because I have to.  It's not like I'm chomping at the bit to get myself in the kitchen, stand for an hour or more (oh, my aching back!), and make a huge mess that I'm going to have to clean up.  No, that's not me.  What I DO like is making people happy.  And food is a great way to please people.  I also realized that it's not the cooking I love.  It's the creating.  Which is probably why I have the most fun with desserts.  Well, for that reason and also my sweet tooth.  ;-)

I get daily emails from Allrecipes to feed the creativity and variety in my meal management life.  Today's email contained a recipe for potato chips.  I was pretty skeptical.  I don't even usually eat plain potato chips.  But I figured, I had a potato and the time (must be a blue moon).  So I tried it!  And it worked beautifully!!!

Pros: no factory added ingredients, full control over seasoning flavors and amounts, gourmet for cheap, improvement on knife skills (if you don't have a mandolin), no bag to keep eating and eating from, and "rich" enough to where you can't really eat a lot.  And just plain good nutrients from potatoes and olive oil!

Cons: uh...time spent slicing a potato?  I'd say the health pay-off and price for homemade chips is well worth the couple minutes of slicing.  Oh, another con could be how FAST they go -- my boys had the first batch eaten before the next one was finished!

Homemade Potato Chips
adapted from Allrecipes

Russet potato(es)
Olive Oil
Salt and/or other seasonings (optional)
Parchment Paper

Thinly slice potato(es), peeled or not.  Place in a bowl; drizzle with a touch of olive oil and gently toss to coat. Cut a big circle of parchment paper to fit your microwave turntable.  Place a single layer of potato slices on parchment paper being careful that they do not touch.  Microwave anywhere from 3-6 minutes depending on the thickness of the slices.  Check the potatoes OFTEN after 2 minutes.  You will see them start to brown; and once it starts, it goes fast.  So be sure to not overcook them.  Slide chips from parchment into a bowl and season as desired.

*The thicker you slice them, the more "gourmet" they seem.  The thinner you slice them, the more they will be like Lays.  Both are tasty!
*If you do not have parchment paper, the original recipe said to olive oil a plate.  That was not quite as easy/successful for several of the reviews I read...and then you have a dirty plate.